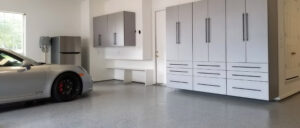
DURABLE FLOORING
Give your garage a gorgeous floor that lasts and lasts.
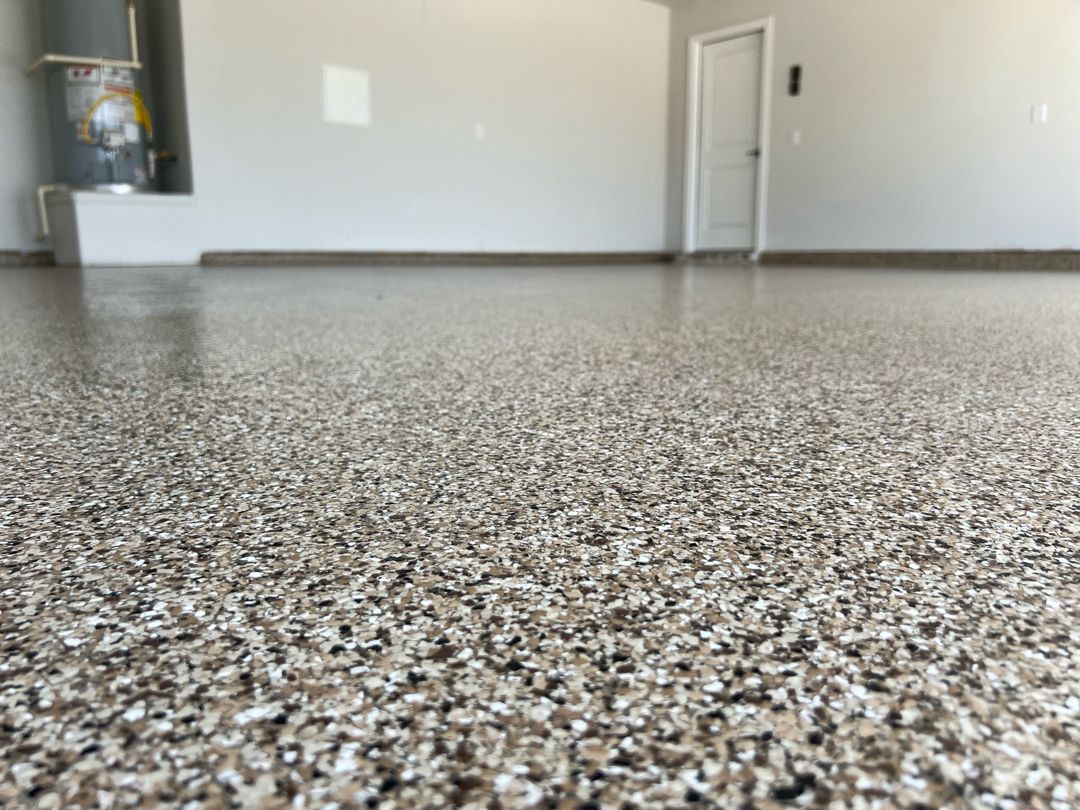
CLEAN AND NON-SLIP
Our flooring makes your garage easy to clean and safe to use.
LIQUID RESISTANT
Wall-to-wall flooring that resists water, oils, and chemicals.
Garage Flooring Company in Orlando
Orlando’s climate is one of the most punishing environments on the planet for a garage floor. The combination of a notoriously high water table — particularly in low-lying neighborhoods like Lake Nona and Southchase — and daily summer humidity above 80% creates relentless hydrostatic pressure beneath your concrete slab. If your garage faces west on a lot near the Dr. Phillips corridor or the Windermere lakefront communities, you’re also dealing with intense afternoon UV exposure that destroys standard epoxy coatings from the outside in.
Most floors installed by budget contractors in Central Florida begin delaminating within 18–24 months. We’ve seen it happen on brand-new construction in Lake Nona and on established homes off Apopka-Vineland Road alike.
This is not a generic floor coating problem. It is a Central Florida problem — and it requires a Central Florida solution.As part of our complete garage renovation services in Orlando, Garaginization has been the trusted, locally-operated choice for Central Florida homeowners since 2008. Our garage flooring work is one cornerstone of a full-service approach — and every floor we install is backed by our in-house team of W2 employees, never subcontractors.
DISCOVER YOUR OPTIONS
Why Orlando Garages Fail — And What We Do Differently
Most garage floor failures in Central Florida share the same root cause: a contractor who used the wrong prep method, the wrong product, or both. The Orlando market is full of crews who apply a national franchise system designed for a dry climate to a slab sitting above one of the most active aquifers in the country. The result is a floor that looks great at the six-month mark and is bubbling by month eighteen. We’ve inspected hundreds of them. The three factors below are where corners get cut — and where we don’t.
Florida Building Code & The MVT Problem
Read More »
Orange County falls under the Florida Building Code (FBC), which governs concrete surface preparation standards for coatings applied to occupied structures. Beyond code, Central Florida’s geology presents a unique challenge: the Floridan Aquifer System sits close to the surface across much of the metro area, meaning moisture vapor transmission (MVT) in concrete slabs is not an edge case — it is the default condition.
This is why chemical acid washing alone fails here. Acid etching does not open the concrete’s pore structure sufficiently to allow a coating to bond against active hydrostatic pressure. Florida’s construction standards increasingly recognize mechanical surface profiling (diamond grinding to CSP 2–3) as the minimum acceptable prep for permanent coating adhesion. Garaginization diamond-grinds every floor — no exceptions, no shortcuts.
Diamond Grinding vs. Acid Wash
Read More »
Many contractors will suggest preparing your floor with an acid wash, power wash, or even a simple “sweep and spray.” These processes will never properly prepare your slab for Central Florida conditions, and you are guaranteed to see peeling within one to two seasons. Garaginization uses only diamond grinding — the mechanical standard that creates the anchor profile required for a permanent, lifetime bond.
100% Solids Epoxy + Polyaspartic — Not Water-Based Alternatives
Read More »
Various forms of epoxy, polyurethane, and polyaspartic coatings may look similar on day one. Over time in a Florida climate, they perform very differently. Through years of field testing across Central Florida, we use only 100% solids epoxy base coats and 90%+ solids polyaspartic topcoats. Water-based alternatives off-gas solvents during cure, leave a thinner film, and cannot withstand the UV intensity and heat cycling of an Orlando garage.
Features & Benefits
How We Install Your Orlando Garage Floor — Step by Step
Step 1: Moisture Vapor Testing & Concrete Profiling
Before any coating touches your floor, our crew performs on-site moisture vapor transmission (MVT) testing. We then diamond-grind the entire slab to a Concrete Surface Profile (CSP) of 2–3, the standard required for a permanent coating bond. Cracks, spalling, and control joints are filled and feathered. Where permit documentation is required, we coordinate with the Orange County Building Division.
Step 2: 100% Solids Epoxy Base Coat + Full-Broadcast Flake
A tinted 100% solids epoxy primer is applied directly to the profiled slab. Unlike water-based alternatives, 100% solids epoxy contains no solvents to off-gas — eliminating the lingering chemical smell common with budget products. Decorative vinyl flake chips are then broadcast to full coverage, locking in texture and providing the anti-slip aggregate layer critical for wet Florida weather.
Step 3: UV-Stable Polyaspartic Topcoat & Final Inspection
The final coat is a 90%+ solids polyaspartic clear coat — molecularly engineered to resist UV ambering, thermal shock from Florida’s daily heat cycles, and hot-tire pickup. Once cured (typically 24 hours to light foot traffic, 72 hours to full vehicle load), our crew conducts a final walk-through inspection. Warranty documentation is filed with our Orlando office at 11245 Satellite Blvd, Suite 300.

What Our Customers are Saying:
Beyond the Garage: Flooring for Any Concrete Surface in Orlando
Your garage slab takes the most abuse — but it’s not the only concrete in your home that’s fighting Florida’s humidity, UV exposure, and daily wear. We install the same professional-grade coating systems on any surface that needs to perform, not just look good on day one.
Patios & Outdoor Entertaining Areas Orlando’s afternoon storms arrive fast and leave surfaces wet without warning. A bare concrete patio becomes a liability the moment it rains. Our polyaspartic-coated patios are UV-stable (no fading or yellowing in direct Florida sun), fully slip-resistant with broadcast aggregate, and chemical-resistant enough to handle outdoor furniture, grills, and the occasional spilled drink. If your patio faces west — as many Dr. Phillips and Windermere homes do — UV stability isn’t optional. It’s the whole game.
Commercial & Light Industrial Spaces Not every slab is in a home garage. We regularly coat floors in office spaces, warehouses, auto detailing bays, and light industrial facilities across the Orlando metro. Our Professional Package is engineered for environments with forklift traffic, chemical exposure, or daily heavy foot traffic — where a standard residential coating would fail within months. If your space demands a floor that can take a beating and still look professional, that’s exactly what we build.
DISCOVER YOUR OPTIONS
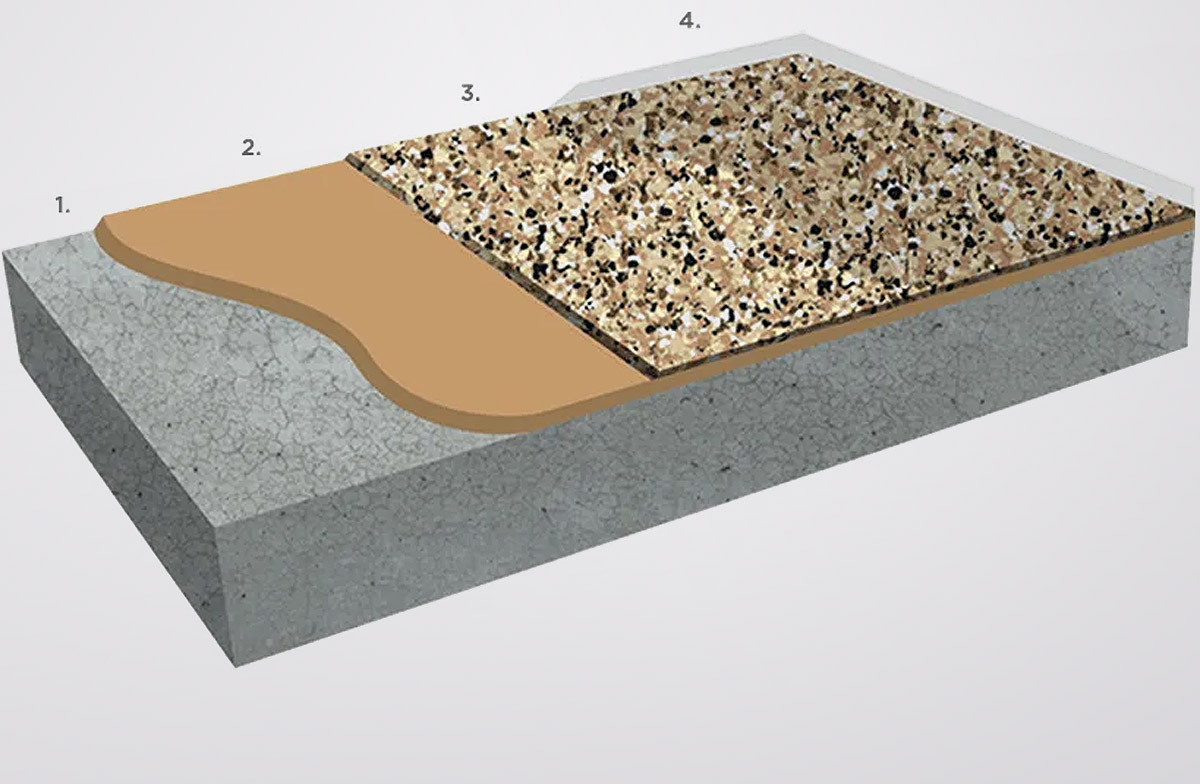
Our Installation Process — No Steps Skipped, No Shortcuts Taken
Every Garaginization floor follows the same four-stage system. The order is not negotiable and neither is the quality of each step. This is what separates a floor that lasts a decade from one that peels in a season.
Step 1 — Diamond Grinding & Slab Repair
We begin by mechanically profiling your entire concrete slab with industrial diamond grinders, achieving a Concrete Surface Profile (CSP) of 2–3. This opens the pore structure of the concrete at a level that acid washing cannot replicate. Before grinding, all cracks, control joints, and spalled areas are filled and feathered flush — because a coating is only as strong as the surface beneath it.
Step 2 — 100% Solids Epoxy Base Coat
Once the slab is profiled and clean, we apply a tinted 100% solids epoxy primer directly to the prepared surface. This is not a water-based product. There are no solvents to off-gas, no shrinkage during cure, and no compromise on film thickness. This layer is the structural bond between your concrete and everything above it.
Step 3 — Full-Broadcast Decorative Chip
Vinyl flake chips are broadcast across the wet base coat at full coverage — edge to edge, no thin spots. Full coverage is non-negotiable: it locks in the anti-slip texture, hides minor surface variations, and gives the floor its finished character. We carry a full range of color blends, from understated neutrals to bold custom mixes.
Step 4 — Polyaspartic Topcoat
The final layer is a 90%+ solids polyaspartic clear coat — the hardest-wearing, most UV-stable finish available for residential and commercial concrete floors. It will not amber in Florida sunlight, will not lift under hot tires, and will not stain from oil, chemicals, or standing water. This is the coat that carries our warranty and the one that still looks pristine years after installation.
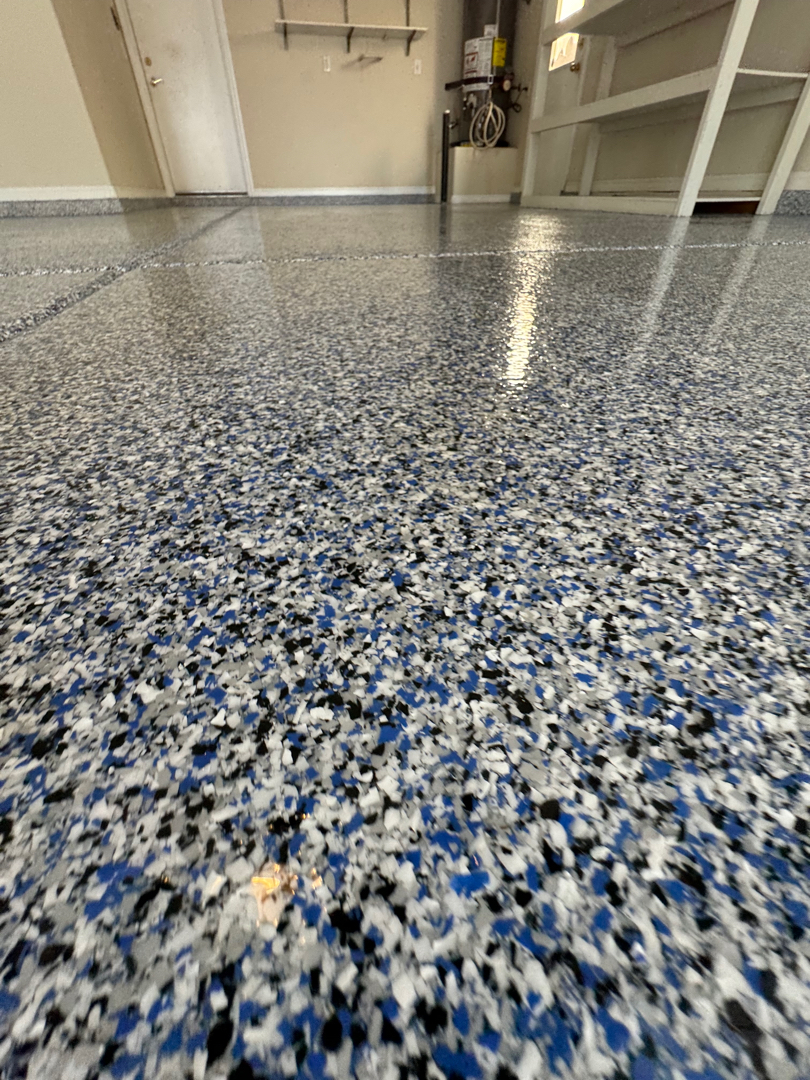
Hundreds of Color Combinations Available
Garaginization offers the largest selection of epoxy flooring colors and styles. If you are looking for us to work with you on a custom color blend, we are happy to do so, however, we have found some of the most popular colors below most often achieve your goals.
Please see variations below.
FAN FAVORITES


GRANITE SERIES
Grey Tones


Beige Tones


TERRAZZO SERIES


Frequently Asked Questions: Garage Flooring in Orlando
Why do so many DIY garage floor kits peel after just one Florida summer?
Big-box store epoxy kits are water-based, meaning they contain a high percentage of solvent that evaporates during cure — leaving a thinner, more porous film. Combined with Central Florida’s chronic moisture vapor transmission from below and UV degradation from above, these coatings typically begin delaminating within one to two seasons. The fix is mechanical surface prep (diamond grinding) and 100% solids chemistry, not a better brand of DIY kit.
What is moisture vapor transmission (MVT), and how does it destroy standard epoxy floors in Orlando?
MVT is the movement of water vapor upward through a concrete slab, driven by the pressure differential between the moist soil below and the drier air above. In Central Florida, where the water table is high and rainfall is intense, this pressure is nearly constant. Standard epoxy coatings are not vapor-permeable, so moisture accumulates beneath them and eventually forces the coating off the slab — a process called delamination. Our system addresses this with MVT testing and, where necessary, a vapor mitigation layer before any coating is applied.
How long before I can park my car on the new floor?
With our polyaspartic topcoat system, light foot traffic is typically safe within 24 hours of final coat application. We recommend waiting a full 72 hours before driving a vehicle onto the floor, and 7 days before parking a vehicle that has been driven for an extended period (hot tires). We’ll walk you through the exact timeline based on ambient temperature and humidity on your installation day.