

A finished garage floor can make the entire room feel cleaner, brighter, and easier to use. But the visible coating or floor system is only as reliable as the concrete beneath it. Learning how to prepare garage flooring means addressing the conditions that cause peeling, bubbling, staining, and premature wear before a new surface is installed.
For families using the garage for vehicles, tools, sports equipment, hobbies, and household storage, flooring preparation is not a cosmetic detail. It is the foundation for a space that is easier to clean, safer to walk on, and polished enough to complement premium cabinets, slatwall, and overhead storage.
Start With an Honest Assessment of the Concrete
Every garage slab tells a different story. Some are newly poured and relatively clean. Others have years of vehicle fluid stains, hairline cracks, old paint, adhesive residue, or surface damage from moisture and temperature changes. Before choosing a flooring system, inspect the entire slab in good lighting.
Look for cracks, pitting, flaking concrete, dark stains, white powdery residue, and areas where an existing coating is lifting. White residue, often called efflorescence, can be a sign that moisture is moving through the slab. A coating installed over an unresolved moisture issue may lose adhesion, no matter how attractive it looked on installation day.
It also helps to identify how the garage is used. A family garage that sees daily vehicle traffic, lawn equipment, bicycles, and weekend projects needs a different level of surface durability than a lightly used storage area. The right preparation plan depends on the slab’s condition, expected traffic, climate, and the flooring system selected.
How to Prepare Garage Flooring Before Installation
Proper preparation follows a clear sequence: clear the space, inspect the slab, test for moisture, repair damage, remove contaminants, create the right surface profile, and clean again. Skipping any stage can compromise the finished floor.
Empty the garage completely
The floor needs to be accessible from wall to wall. Moving items from one side of the garage to the other may seem practical, but it prevents a full inspection and makes it difficult to prepare the surface consistently.
This is also an ideal opportunity to decide what should return to the garage and what should be stored differently. Once the floor is finished, organized storage systems can keep seasonal bins, sports gear, tools, and household overflow off the ground, protecting the investment and making daily cleanup far simpler.
Check moisture before committing to a coating
Concrete is porous, and moisture vapor can travel upward through the slab even when the surface appears dry. This is particularly relevant in humid climates and in garages with drainage issues, but it can occur anywhere.
Professional installers use appropriate moisture testing methods to determine whether the slab is suitable for the selected flooring system. A simple visual inspection cannot reliably measure vapor transmission. If moisture levels are high, the solution may involve a compatible moisture-mitigation approach, a different flooring material, or addressing water movement around the property before installation.
This step protects against one of the most frustrating flooring failures: a surface that looks excellent initially but begins to blister or separate from the concrete later.
Repair cracks, pits, and damaged areas
Small hairline cracks are common in garage concrete, but they should still be evaluated and properly filled before flooring is applied. Larger cracks, active movement, crumbling edges, and deep pits require more careful attention. The repair material must be compatible with both the concrete and the floor system that will cover it.
Not all cracks are merely cosmetic. If a crack is widening, uneven from one side to the other, or associated with noticeable settlement, it may point to a larger slab issue. Covering that condition without addressing it can lead to a disappointing result. An experienced flooring professional can help distinguish routine surface repairs from problems that need further evaluation.
Remove oil, grease, paint, and old coatings
Garage floors collect contaminants over time. Motor oil, grease, tire residue, household chemicals, paint, and old sealers can prevent a new coating from bonding correctly. Surface cleaning is necessary, but cleaning alone is not always enough when contaminants have penetrated the concrete.
Old paint or failing coatings also need to be removed rather than simply covered. A new floor system cannot bond more strongly than the weak layer beneath it. If the previous coating is peeling, the new installation may peel with it.
Create the Surface Profile the Floor System Needs
A garage floor coating needs more than a clean surface. It needs concrete with the proper texture, or profile, for mechanical adhesion. Think of it as giving the flooring material a sound, prepared surface to grip rather than asking it to adhere to smooth, sealed concrete.
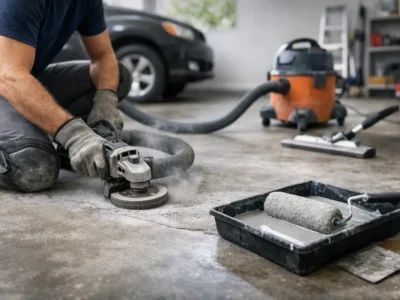
Professional preparation often uses diamond grinding equipment with dust-control systems to remove weak surface material and create a consistent profile. This method is precise, helps reveal hidden cracks or defects, and avoids leaving behind chemical residues that may interfere with installation.
Acid etching is sometimes discussed as an alternative, but it is not automatically the right answer for every slab. Results can be inconsistent when concrete has dense areas, sealers, contaminants, or prior coatings. It also requires careful neutralization and cleanup. The best method depends on the existing concrete and the flooring product being installed, which is why a site assessment matters.
After mechanical preparation, the floor should have a uniform, clean appearance and feel slightly textured rather than slick. The goal is not to make the concrete rough for its own sake. The goal is to create the profile required for durable adhesion.
Control Dust and Perform a Final Cleaning
Grinding and repairs create fine dust that can settle into cracks, edges, and low spots. Before a flooring system is applied, that dust must be removed completely. Professional crews use commercial vacuums and detailed cleanup practices because ordinary sweeping can leave behind a film that affects bonding.
The final inspection should confirm that the slab is dry, clean, structurally sound, and free of loose material. It should also include the perimeter of the garage, transitions to adjacent surfaces, and any areas where moisture or contaminants were previously identified.
Timing matters here. Once the floor is prepared, it should be coated according to the material manufacturer’s requirements. Leaving a freshly prepared slab exposed to new dirt, spills, or humidity for too long can create unnecessary setbacks.
Plan the Floor Around the Way Your Family Uses the Garage
Flooring preparation and garage organization work best when planned together. If your goal is to park vehicles while keeping bikes, camping equipment, sports gear, and tools accessible, the layout should support that use from the beginning.
A professionally finished floor provides a clean base, while cabinets, wall systems, workbenches, and overhead storage keep bulky items where they belong. This reduces clutter on the floor, protects stored belongings from dust and moisture, and preserves clear walking paths. The result is a garage that supports everyday routines instead of becoming a catch-all room.
Color and finish deserve practical consideration, too. Lighter systems can make a garage feel more open and reflect more light, while multi-tone decorative finishes can help disguise ordinary dust and tire marks. A textured finish can improve footing, though excessive texture may make sweeping more difficult. The best choice balances appearance, traction, maintenance, and how the space will be used.
Why Professional Preparation Is Worth It
Garage flooring is a one-time-investment decision when it is specified and installed correctly. The value is not just in the final color or shine. It is in the assessment, repair work, moisture awareness, surface preparation, and controlled installation that help the finished floor perform as intended.
Garaginization approaches the garage as a complete functional environment, not a collection of separate upgrades. A floor that is prepared correctly creates the finished foundation for organized storage, safer access, and a space your family can use with confidence for years.
Before selecting a garage floor system, start with the slab itself. A professional consultation can identify the conditions beneath the clutter and provide a clear path toward a cleaner, more capable garage that is built around the way your household actually lives.
 Is Garage Storage Return on Investment Worth It?